
This weekend I FINALLY got around to making a terra cotta pot wreath I had seen on Pinterest - a country chic sort of Fixer Upper style spring wreath with succulents. (No green thumb here - I opted to make mine with fake plants.) I sucked it up and braved the weekend crowds to pick up the rest of my materials and headed home to get started. I wanted the pots to have an aged looked so I turned to my new favorite paint, Amy Howard One Step Chalk Paint. This is a water-based paint that adheres to almost anything and with little to no prep. These pots didn't require any prep work at all, but for other pieces all you need to do to prep an item for painting with AHOS is use a degreaser and clean with water. No sanding. Yes, you read that correctly. NO SANDING. It dries with a beautiful, chalky finish that looks just like a pot that's been weathered in the garden for years. {This paint is great for reviving, refinishing and antiquing furniture along with AH waxes, milk paint, sealer, crackle, and more!)
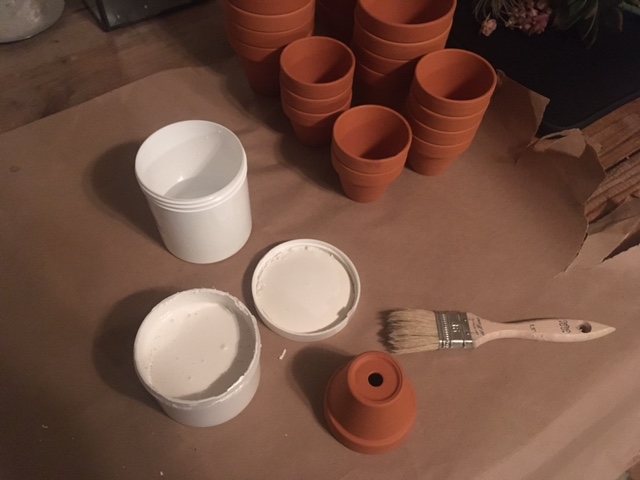
First, I covered my kitchen table with craft paper and laid out my materials:
- Amy Howard One Step in Bauhaus Buff
- clay pots - (12) 3 in and (10) 2 in for a 24" wreath
- a cup of water
- chip brush
- paper towels
Depending on how you want your "aged" pot to look, you could repeat this process below with a gray paint as well, to give it a bit more dimension. I was happy with how white looked by itself, so I didn't introduce any gray this time.
Dip the tip of your brush into the water, getting just the ends of the bristles wet. Tap the brush into the paint lightly, again just on the tip of the brush. (You can use the paint in the lid to have a little more control over how much is getting on your brush.

Off-load some of the paint on your craft paper or a paper towel, so the brush isn't too wet or too full of paint. As you start to work on your pots, you'll find a sweet spot of how much water/paint and how much to wipe off before painting as you perfect the look you want.
Lightly brush the outside of your pot - don't forget the bottom! - adding more water and paint to your brush as necessary.

I just wanted a little bit of aging, so I didn't go too heavy on the paint or water. Once you're happy with it, set it aside to dry, which literally takes minutes, and pick up the next one!. Note: If you're thinking of putting this outside, consider spraying pots with a matte sealer before assembling your wreath, or if you're using this technique on pots for a different use that will be outside.
After these were dry, I got together the rest of my materials for the wreath:
- 24" grapevine wreath
- floral foam
- fake plants - succulents and stems (I got a couple of single succulents and a few various stems - sage, some other light green greenery, spider plants. grass, etc.in similar color tones - and removed the leaves from the stems)
- Spanish moss in brown and light green
- hot glue gun and glue sticks
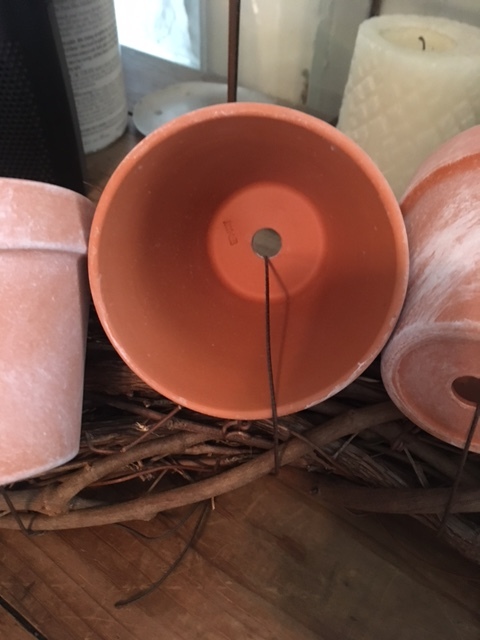
- brown wire - I found some nice natural looking wire pre-cut in 12" lengths at Michael's but on a roll works just as well (if you like the look of twine you could use that as well, it just might not be as secure)
Thread a piece of wire through the pot and arrange the pots on the wreath in alternating directions. It doesn't have to be perfectly symmetrical - some up, some down, some left, some right - do whatever looks good to you.
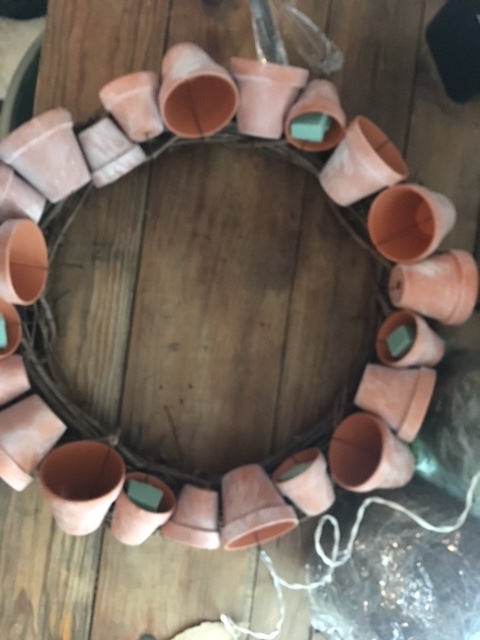
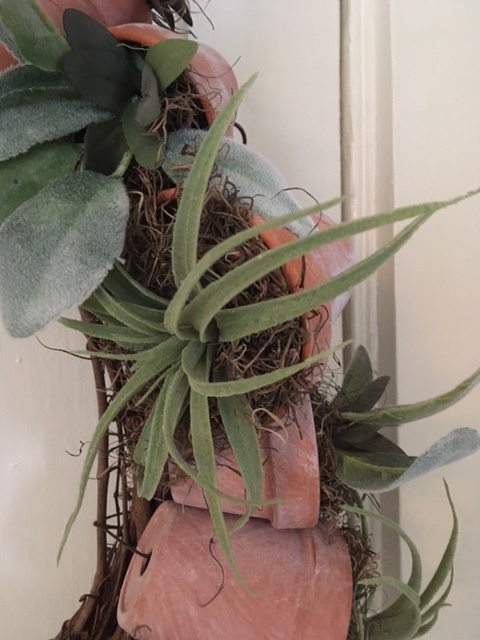
Once they're all in place, put a piece of floral foam in each pot. Now the fun part - arrange the plants! I filled all of the pots before starting to glue anything in case I need to rearrange. I got a few stems of different leaves and such at Michael's. pulled everything off the stems and put in the pots as if they were their own plants - I also filled in around some of the bigger plants with more greenery to make the pot look nice and full. After I was happy with them all I started adding moss to cover up the foam, securing with hot glue and poking down into the pot with a leftover chopstick I found in my silverware drawer.
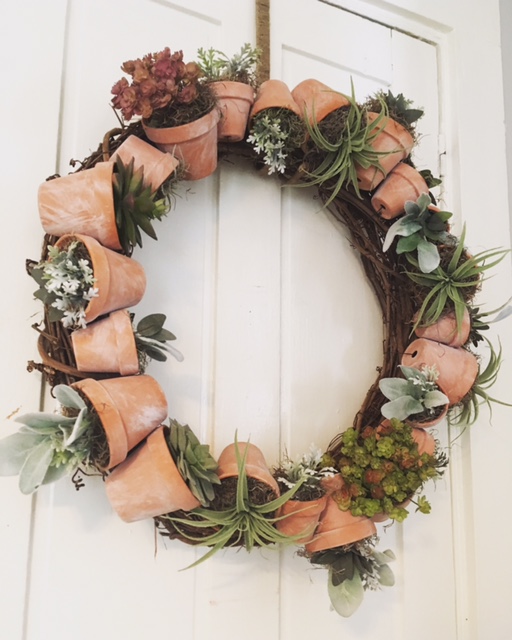
It's pretty heavy so make sure you secure it properly wherever you're hanging it. And that's it! What do you think?